Today I learned that if there are 10 or more 本場, then there won't be 三飜縛り.
Of course that's all jargon to the layperson. So here's a short post on what 本場 is.
本場 (Honba, literally meaning counting a situation with bars) are point sticks that are used to keep track of how long the current round. Don't confuse them with the Riichi sticks; those are red, while Honba are black.
Consider this my first post on the scoring system of Japanese style Mahjong. We start with the currency of the game; point sticks. There are 4 different kinds, which correspond to different amounts:
- 100 points is the black dots stick (The number of black dots on the stick tends to vary from set to set; mine for example has 1 black dot, the iPhone game I play with has 6 black dots, and another set uses 10). These are the sticks used to count Honba.
- 1000 points is the 1 red dot stick, these are the sticks that are most familiar, the Riichi sticks.
- 5000 points is, appropriately, the 5 red dot stick.
- 10000 points is the really fancy looking one, for a lack of a better description.
The amount of sticks in a set tend to vary. For a standard 25,000 point initial game, each player would get 1 10000 point stick (10000), 2 5000 point sticks (10000), 4 1000 point sticks (4000) and 10 100 point sticks (1000).
Honba is basically bonus points for making a round last longer. Let me introduce some conventional terms so that we understand each other:
- A hand is basically one game within a round.
- A round encompasses all hands before changing winds; so a round = a wind.
- A round ends after a full rotation of winds (So, 4 rounds).
For a round to continue after a hand, one of the following conditions must be true:
- The dealer wins the hand
- In a drawn hand, the dealer is in tenpai
- The hand was drawn due to a special condition (Will do a post on this eventually).
Therefore, for a round to rotate, AKA rotate winds, anyone other than the dealer must win.
If a round continues after the first hand, the dealer must place one 100 point stick on the table; this is referred to Honba. Each time after that, they still must put one 100 point stick for every continuing round. For example, the dealer wins the first hand of the round, so he must put a 100 point stick. The next hand is drawn, with dealer in tenpai. He puts another 100 point stick so now there are two. He wins the next hand, and puts another 100 point stick so that there are three.
Take not now that the dealer's Honba are for use as indicators only, not for payment. So when the round finally ends, the dealer takes back all his sticks.
I mentioned before that Honba are bonus points. This is basically how they work:
Suppose there are n Honba, where n is an integer. When calculating the points of a winning hand, after the hand portion of the calculation, you add this total to the Honba portion.
For a Ron, the formula is "n * 300"; the player who dealt into the hand pays this amount.
For a Tsumo, the formula is "n * 100"; all players pay this amount.
So for the first hand of a round, either formula would result in multiplication of zero, so nothing is added onto the raw hand score.
I end this post by mentioning that some variants use the 二飜縛り rule. The 二飜縛り (ryanhan shibari, literally two han binding), is in effect after Honba reaches 5, and the rule prevents anyone from winning unless their hand has two or more han.
Hence the opening sentence; I managed to make a round last for 10 Honba, and thought maybe that the 二飜縛り would go to 三飜縛り (3 han); in other words, +1 Han every 5 Honba.
Search This Blog
Showing posts with label Mahjong. Show all posts
Monday, June 13, 2011
Monday, May 23, 2011
咲 -saki- 麻雀牌 ver.3.0
I said I was going to buy the Touhou Mahjong set, but instead, decided to go with the Saki set. The images will speak for themselves:
Original Package - Front
Original Package - Back
Close up of back
Package unwrapped
The insides
Man and Honor tiles
Pin and Sou tiles
The back of the tiles
Size comparison with my travel set
The only thing disappointing was that the case didn't have a handle to make it easier to carry. But in their defense, carrying tiles vertically instead of horizontally is damaging, so I'll let it slide.
Monday, May 16, 2011
Monday, May 9, 2011
九蓮宝燈
九蓮宝燈, literally, Nine Lotus Treasure, but translated into Nine Gates, is the least probable hand you can get in Mahjong, second to the Thirteen Orphans (Although some would contest that). Nine Gates is the one of two hands that, after many years of playing, I have yet to attain legitimately (The other being 緑一色, or All Green / Emerald Dragon, which in theory is much more probable than Nine Gates).
The Nine Gates hand is shown below:
Which is basically 1-1-1-2-3-4-5-6-7-8-9-9-9 of any suit; that would be your 13 tiles. Your wait would be any number of that suit, so 9 possible waits in total. This is also the hand with the largest number of possible waits, as most hands wait on either 1 or 2 tiles.
How do you win with any of the numbers? Let's go through them. For example, let's say your opponent discards 1 Man, or you draw 1 Man. Then your winning hand would be:
1 Man: 1-1-1, 1-2-3, 4-5-6, 7-8-9, 9-9 Eyes
We can show this for any other number, and if you observe carefully, a pattern forms.
2 Man: 1-1-1, 2-2 Eyes, 3-4-5, 6-7-8, 9-9-9
3 Man: 1-1 Eyes, 1-2-3, 3-4-5, 6-7-8, 9-9-9
4 Man: 1-1-1, 2-3-4, 4-5-6, 7-8-9, 9-9 Eyes
5 Man: 1-1-1, 2-3-4, 5-5 Eyes, 6-7-8, 9-9-9
6 Man: 1-1 Eyes, 1-2-3, 4-5-6, 6-7-8, 9-9-9
7 Man: 1-1-1, 2-3-4, 5-6-7, 7-8-9, 9-9 Eyes
8 Man: 1-1-1, 2-3-4, 5-6-7, 8-8 Eyes, 9-9-9
9 Man: 1-1 Eyes, 1-2-3, 4-5-6, 7-8-9, 9-9-9
If you observe the eyes in each hand, you will be able to see some symmetry; 1 Man results in 9 Eyes, while 9 Man results in 1 Eyes. It is a fallacy to think that the tile you win off of becomes the Eyes number; 3 and 7, as well as 4 and 6 Man wins result in 9 and 1 Eyes respectively.
Therefore, 1 and 9 acts the most as Eyes, with 3 hands, where the rest of the winning tiles act only act as 1 Eyes. Ironically, but not really since there is a logical pattern, the number of tiles of that certain number results in the number of possible winning hands that it is the eyes in.
The Nine Gates hand is shown below:
Which is basically 1-1-1-2-3-4-5-6-7-8-9-9-9 of any suit; that would be your 13 tiles. Your wait would be any number of that suit, so 9 possible waits in total. This is also the hand with the largest number of possible waits, as most hands wait on either 1 or 2 tiles.
How do you win with any of the numbers? Let's go through them. For example, let's say your opponent discards 1 Man, or you draw 1 Man. Then your winning hand would be:
1 Man: 1-1-1, 1-2-3, 4-5-6, 7-8-9, 9-9 Eyes
We can show this for any other number, and if you observe carefully, a pattern forms.
2 Man: 1-1-1, 2-2 Eyes, 3-4-5, 6-7-8, 9-9-9
3 Man: 1-1 Eyes, 1-2-3, 3-4-5, 6-7-8, 9-9-9
4 Man: 1-1-1, 2-3-4, 4-5-6, 7-8-9, 9-9 Eyes
5 Man: 1-1-1, 2-3-4, 5-5 Eyes, 6-7-8, 9-9-9
6 Man: 1-1 Eyes, 1-2-3, 4-5-6, 6-7-8, 9-9-9
7 Man: 1-1-1, 2-3-4, 5-6-7, 7-8-9, 9-9 Eyes
8 Man: 1-1-1, 2-3-4, 5-6-7, 8-8 Eyes, 9-9-9
9 Man: 1-1 Eyes, 1-2-3, 4-5-6, 7-8-9, 9-9-9
If you observe the eyes in each hand, you will be able to see some symmetry; 1 Man results in 9 Eyes, while 9 Man results in 1 Eyes. It is a fallacy to think that the tile you win off of becomes the Eyes number; 3 and 7, as well as 4 and 6 Man wins result in 9 and 1 Eyes respectively.
Therefore, 1 and 9 acts the most as Eyes, with 3 hands, where the rest of the winning tiles act only act as 1 Eyes. Ironically, but not really since there is a logical pattern, the number of tiles of that certain number results in the number of possible winning hands that it is the eyes in.
Monday, May 2, 2011
盗むするかどうかを盗むために
Excuse the awful title of this post for anyone who knows Japanese; was trying to translate "To steal or not to steal" or "Whether to steal or not to steal".
Another short theory post, this time regarding whether to rely on your opponent's discards, or to attempt to win with only the tiles you draw.
This is really just another common sense thing. At the beginning of the game, most of the time you don't want to be taking other player's discards. Not only would that limit your options late game, but it also reveals to your opponent what you are potentially going for.
In regards to limiting your options, for example if you declare Pon on a 1 Man, then in order to win, you either have to go for:
- All Pon
- Half/Full flush of Man
- Pon of Round/Self wind or Dragon
- Win from last discard/draw; "Bottom of the Ocean"
If however, you don't take the 1 Man, and therefore are left with two 1 Man in your hand, you can go for any hand possible; it just depends on how the rest of your hand looks. Also, your opponent can only guess what hand you are attempting based on your discards. Lastly, you have access to Riichi, which was discussed previously.
This isn't to say to never take discards early game, since a round/self wind or dragon means an instant win condition. Also, if your hand is nearly complete, 1-3 Shanten, then taking it would be wise even if it partially reveals your motives. This would force your opponents to play defensively, and quite possibly result in only you being in Tenpai if the game does end without a winner.
During and after the halfway point (since there are 69 tiles available to be drawn, this would be ~34 tiles left, or 1 full wall) is when you have to start relying on opponent's discards if you aren't already in Tenpai. Since the probability of drawing what you need is much lower than early game, attempting Riichi is much more difficult. That, coupled with the large discard pool, means a much lower chance of winning (which was elaborated on in my last post).
Endgame is where you really want to call everything possible (I consider endgame ~10 tiles left). Even if you can't win, you might want to go for Tenpai. In most cases, you would want to try and Tenpai. I say might because there are some situations where you would not want to reveal your hand (since the declaration of Tenpai at the end of a drawn game is coupled with showing your tiles). This could be because you don't want to show new opponents the way you play (aggressively, by focusing on completing your hand, or defensively, by keeping dangerous tiles to yourself). Of course a good player is able to do both, but even so there are situations where you don't want to reveal your hand.
Another short theory post, this time regarding whether to rely on your opponent's discards, or to attempt to win with only the tiles you draw.
This is really just another common sense thing. At the beginning of the game, most of the time you don't want to be taking other player's discards. Not only would that limit your options late game, but it also reveals to your opponent what you are potentially going for.
In regards to limiting your options, for example if you declare Pon on a 1 Man, then in order to win, you either have to go for:
- All Pon
- Half/Full flush of Man
- Pon of Round/Self wind or Dragon
- Win from last discard/draw; "Bottom of the Ocean"
If however, you don't take the 1 Man, and therefore are left with two 1 Man in your hand, you can go for any hand possible; it just depends on how the rest of your hand looks. Also, your opponent can only guess what hand you are attempting based on your discards. Lastly, you have access to Riichi, which was discussed previously.
This isn't to say to never take discards early game, since a round/self wind or dragon means an instant win condition. Also, if your hand is nearly complete, 1-3 Shanten, then taking it would be wise even if it partially reveals your motives. This would force your opponents to play defensively, and quite possibly result in only you being in Tenpai if the game does end without a winner.
During and after the halfway point (since there are 69 tiles available to be drawn, this would be ~34 tiles left, or 1 full wall) is when you have to start relying on opponent's discards if you aren't already in Tenpai. Since the probability of drawing what you need is much lower than early game, attempting Riichi is much more difficult. That, coupled with the large discard pool, means a much lower chance of winning (which was elaborated on in my last post).
Endgame is where you really want to call everything possible (I consider endgame ~10 tiles left). Even if you can't win, you might want to go for Tenpai. In most cases, you would want to try and Tenpai. I say might because there are some situations where you would not want to reveal your hand (since the declaration of Tenpai at the end of a drawn game is coupled with showing your tiles). This could be because you don't want to show new opponents the way you play (aggressively, by focusing on completing your hand, or defensively, by keeping dangerous tiles to yourself). Of course a good player is able to do both, but even so there are situations where you don't want to reveal your hand.
Monday, March 28, 2011
立直
One of the things that intrigue me about the Japanese style of Mahjong is the Riichi system. If anything, it is a system which balances risk vs. reward. At the cost of 1000 points, you can declare Riichi, which basically gives you a win condition. Of course you can only do this if your hand is completely concealed, with the exception of a self Kan. Therefore, with Riichi, players will tend to be divided into two play styles, which I will shortly evaluate now.
1) The "Win Any Way Possible" players
Most beginners and those that are unfamiliar with Japanese Mahjong fall under this category. These are the players who don't care about points; only about winning, even with the worst hands imaginable. Sure it's fun to win, but half the fun of winning is the challenge. Playing Chicken or using the easiest win condition (Pon of a dragon, or seat/round wind) can get dull fast. Granted everyone starts in this category, but only those dedicated move on to the second category.
2) The "Win Elegantly" players
What do I mean by elegantly? I think it's just a word to encompass the players that go for complex hands, attempt to Riichi, pay attention to the Dora indicators, change their strategy based on the flow of the game, and in general, not just try to win, but to WIN.
Category 2 players will focus heavily on Riichi, since it changes the flow of the game completely. Let's review what Riichi does on a broad scale:
- Riichi player forgoes 1000 points
- They discard the tile that isn't part of a Tenpai wait
- They then discard any new tile they draw unless that tile grants a Tsumo
At first it may seem that declaring Riichi is a stupid thing to do. Not only do you LOSE points, but you also tell everyone you're in Tenpai, thereby changing the way they play (in the regard of what they discard, etc). In addition, you can't alter your hand, which in a sense makes it harder to win. Is that worth the "free" win condition? Most category 1 players would say no, while most category 2 players would say yes. What causes this distinction? That would be the mentality that each category player holds.
Since category 1 players are so obsessed with winning, they don't want to give their opponent any kind of "advantage" per se. Category 2 players know that even if the opponent knows they're in Tenpai, for the most part it won't alter their chances of winning.
But how is that so if the good player will change from being offensive (constructing their hand), to defensive (discarding safe tiles instead of focusing on their own hand)? Think about it. The defensive player has a much lower chance of winning, since they cater to you, the aggressive Riichi player. Even if you don't win, you're still in Tenpai, so you'll get most, if not all your points back.
One thing about Riichi I have neglected to mention until now, is that if you win, you get access to the Under Dora, which is basically a Dora indicator under the regular Dora indicator. If any Kans had been obtained during that game, then you get access to Under Dora up to the amount of regular Dora indicators. Basically, you double your Dora indicators. So even if the only win condition you have is Riichi, Dora can help boost your score.
Hopefully you (the reader) will now consider becoming a category 2 player. One last thing to keep in mind about Riichi is when to declare, and when not to. Most players will get very excited that they can declare Riichi (since it isn't something you can do every game obviously), and will automatically declare when they can. For the most part, this is a mistake. Two reasons for this:
1) No alteration of waits
Say you draw your next tile, and now you're in Tenpai, with an all concealed hand. Before deciding to declare Riichi, examine your waits. Your waits should always be in your favor. Consider things like:
- The pool, what has or hasn't been discarded
- Terminal waits
- Furiten
The first point is common sense; if the pool consists of 3 of the tile you are waiting for, then it is highly unlikely that you will get the last of that tile.
The second point is also common sense. If you have a 1 and 2, then you are stuck waiting on a 3. On the other hand, if you have a 2 and a 3, you can wait on either 1 or 4, which essentially doubles the chance of winning. Therefore, the best waits for Riichi are sequences with two ends, (such as the aforementioned) or two pairs of any tile. For the latter, this is a good wait, since most of the time there would be little correlation on your waits (You could be waiting on 1 Pin and North wind for example). It helps to prevent your opponents from predicting your wait.
The final point is something I've mentioned previously very extensively. Even if you have a 2 and 3 Pin, waiting on 1 and 4 Pin, if you had discarded 1 Pin at any point in the game, you cannot win if someone discards that tile. It doesn't stop you from declaring Riichi however; it merely lowers your chances of winning.
2) Duration of game
This is a no-brainer. It's best to declare Riichi as early as possible; that way there won't be many discards in your pool for your opponent to read safe tiles from. Declaring Riichi late game is a mistake, since not only do you only have a few rounds of discards to win off of, but your pool is massive, which makes it easy for your opponent to discard safe tiles.
I guess the point I'm trying to make is to use common sense. Riichi is a privilege that shouldn't be abused.
1) The "Win Any Way Possible" players
Most beginners and those that are unfamiliar with Japanese Mahjong fall under this category. These are the players who don't care about points; only about winning, even with the worst hands imaginable. Sure it's fun to win, but half the fun of winning is the challenge. Playing Chicken or using the easiest win condition (Pon of a dragon, or seat/round wind) can get dull fast. Granted everyone starts in this category, but only those dedicated move on to the second category.
2) The "Win Elegantly" players
What do I mean by elegantly? I think it's just a word to encompass the players that go for complex hands, attempt to Riichi, pay attention to the Dora indicators, change their strategy based on the flow of the game, and in general, not just try to win, but to WIN.
Category 2 players will focus heavily on Riichi, since it changes the flow of the game completely. Let's review what Riichi does on a broad scale:
- Riichi player forgoes 1000 points
- They discard the tile that isn't part of a Tenpai wait
- They then discard any new tile they draw unless that tile grants a Tsumo
At first it may seem that declaring Riichi is a stupid thing to do. Not only do you LOSE points, but you also tell everyone you're in Tenpai, thereby changing the way they play (in the regard of what they discard, etc). In addition, you can't alter your hand, which in a sense makes it harder to win. Is that worth the "free" win condition? Most category 1 players would say no, while most category 2 players would say yes. What causes this distinction? That would be the mentality that each category player holds.
Since category 1 players are so obsessed with winning, they don't want to give their opponent any kind of "advantage" per se. Category 2 players know that even if the opponent knows they're in Tenpai, for the most part it won't alter their chances of winning.
But how is that so if the good player will change from being offensive (constructing their hand), to defensive (discarding safe tiles instead of focusing on their own hand)? Think about it. The defensive player has a much lower chance of winning, since they cater to you, the aggressive Riichi player. Even if you don't win, you're still in Tenpai, so you'll get most, if not all your points back.
One thing about Riichi I have neglected to mention until now, is that if you win, you get access to the Under Dora, which is basically a Dora indicator under the regular Dora indicator. If any Kans had been obtained during that game, then you get access to Under Dora up to the amount of regular Dora indicators. Basically, you double your Dora indicators. So even if the only win condition you have is Riichi, Dora can help boost your score.
Hopefully you (the reader) will now consider becoming a category 2 player. One last thing to keep in mind about Riichi is when to declare, and when not to. Most players will get very excited that they can declare Riichi (since it isn't something you can do every game obviously), and will automatically declare when they can. For the most part, this is a mistake. Two reasons for this:
1) No alteration of waits
Say you draw your next tile, and now you're in Tenpai, with an all concealed hand. Before deciding to declare Riichi, examine your waits. Your waits should always be in your favor. Consider things like:
- The pool, what has or hasn't been discarded
- Terminal waits
- Furiten
The first point is common sense; if the pool consists of 3 of the tile you are waiting for, then it is highly unlikely that you will get the last of that tile.
The second point is also common sense. If you have a 1 and 2, then you are stuck waiting on a 3. On the other hand, if you have a 2 and a 3, you can wait on either 1 or 4, which essentially doubles the chance of winning. Therefore, the best waits for Riichi are sequences with two ends, (such as the aforementioned) or two pairs of any tile. For the latter, this is a good wait, since most of the time there would be little correlation on your waits (You could be waiting on 1 Pin and North wind for example). It helps to prevent your opponents from predicting your wait.
The final point is something I've mentioned previously very extensively. Even if you have a 2 and 3 Pin, waiting on 1 and 4 Pin, if you had discarded 1 Pin at any point in the game, you cannot win if someone discards that tile. It doesn't stop you from declaring Riichi however; it merely lowers your chances of winning.
2) Duration of game
This is a no-brainer. It's best to declare Riichi as early as possible; that way there won't be many discards in your pool for your opponent to read safe tiles from. Declaring Riichi late game is a mistake, since not only do you only have a few rounds of discards to win off of, but your pool is massive, which makes it easy for your opponent to discard safe tiles.
I guess the point I'm trying to make is to use common sense. Riichi is a privilege that shouldn't be abused.
Monday, March 21, 2011
麻雀: タイルを数える
In the movie 21, the main character, Ben, participates in "counting cards" in the game of blackjack. This is a simple system which allowed him and his teammates to know which dealers were favorable; in other words, a higher (although slim) probability of winning.
I won't go over the details of how to count cards, but basically they used a -1, 0, 1 system. 2, 3, 4, 5, 6 were given the number -1; 7, 8, 9 were given 0, and 10, Jack, Queen, King, Ace were given +1. The premise of the system is that every time a card was revealed (it doesn't have to be your own), you would add or subtract accordingly. By doing so, we get a "value"; this value tells us whether or not the current deck is favorable to bet on.
Basically, a high value meant it was not favorable (since to get a high value, you exhaust the 10s and Aces, which are the easiest way to win), and a low value meant it was favorable (using the opposite reasoning, by exhausting the low numbers, there is a higher probability of getting those 10s and Aces).
An example to cement the point before I move on:
We add the appropriate numbers as they appear from left to right:
1-1+0+0-1-1-1-1+1+1 = -2
We end up with a final "value" of -2. This tells us that more low numbers have been used, and therefore we have a higher probability of getting 10s and Aces.
Before I go to the main point of this post, I'll mention that Casinos use multiple decks, I think 6 is the number, when playing Blackjack. However, they do not shuffle the cards back in every game; this is what makes the counting system possible.
In this post, I propose the usage of card counting while playing Mahjong. Although the nature is different, the motive is the same; to predict probability during a game.
The simplest way (And perhaps the only practical way) to do so is if you are looking for one particular suit, so you are trying to form either a half flush or a full flush. For example, I am going for a half flush of Pin; we will denote the suit of interest with a value of +1.
For the other suits (AKA the ones we are not interested in), we denote one of them +100, and -100. For our example, we will denote Man +100, and Sou -100.
Finally, any honour tiles will be denoted 0, since these tiles are essentially "floaters", tiles that take up space that most of the time no one wants.
It may seem preposterous to "count" tiles, but I propose that it is in fact practical. Once again, this is best shown with example.
Due to the nature of Mahjong, and how we discard tiles (As opposed to Blackjack, where we can only add cards, not get rid of them), it would be redundant to count tiles in the hand for two reasons:
1. It will result in double counting of your own hand (You count once in the hand, and again when you discard; we are only interested in the discarded ones)
2. You can't see your opponent's hand. If they decide to steal a tile from the discard, then we in fact do include those in the count (only the new tiles revealed by the player declaring Pon, Chi, Kan though).
As such, we will only count discarded tiles, and those revealed when taking from the pool.
I start by discarding 3 Man, and the computer players follow by discarding honour tiles. So the total count so far is +101 (The +1 comes from the Dora indicator, which we also include when counting, as it is "in the pool" per se). As an aside, I pick Man to be +100 because it is easily memorable (In the sense that Man tiles are essentially large numbers, and you obtain large numbers by adding).
We continue in this fashion:
We start with my second discard, 1 Pin, then South player's (Player on the right) second discard.
-1000+0+0+0+0 = +1
Not shown in the picture is that I declared Pon on West player's South tile, hence the triple bolded +0. I now begin again, starting with my third discard, South player's Third discard, then West player's second discard, and North player's second discard. Then we count accordingly:
-100+0-100+0 = -201
+100+1+0+0 = -102
-100+1+0-100 = -303
+100+1-100+1 = -305
+0+1-100-100 = -506
+0-100+100+0 = -506
So the final count (Before I declare Ron) is -506. I know what you're thinking. "-201 + 100 + 1 isn't -102, it's -101". This is true, but it saves work on unnecessary math. The point is to keep track, not to add. So we essentially have two values we keep track: the +100 -100 series (The uninterested tiles) and the +1 series (The tiles of interest). In that sense, only the first digit (And the second digit should the count go to four digit numbers) are subjected to the negative sign.
But what does this number -505 tell us. It lets us infer a few things.
1. As of this point in the game, more Sou tiles have been dealt than Man tiles (This is the only conclusion we can ascertain).
2. There are, at most, 30 Pin tiles left in the game (At most is the best case scenario, as the final 14 tiles are never revealed unless someone gets a Kan. Even so, that leaves 5 Reverse Dora tiles that are not revealed during the game.)
3. The proportion of Sou tiles to the rest of the tiles is less favorable (This is inferred by comparing the first number, in this case 5, with our last number, which is 6. Since the last number is greater than the first number, we infer that it is less probable of drawing a Sou than anything else). This last inference is very sketchy, as the suit of interest only encompasses 25% of all tiles, while the other 75% is encompassed by the other suits and the honour tiles. If there was at least 3 deviations away from that value (So -18 or +18), then it would be a stronger inference that it would be more probable to draw the suit of interest.
It's not hard to keep track of two numbers in your head; with practice it'll help you up your game.
PS: That hand was a half-flush with one triplet honour/wind. The way the hand is constructed, it sums up to 30 fu, 3 fan, which amasses 5800 points, all to be paid by North player (The one who dealt the winning tile). I'll do a post on the point system eventually...
I won't go over the details of how to count cards, but basically they used a -1, 0, 1 system. 2, 3, 4, 5, 6 were given the number -1; 7, 8, 9 were given 0, and 10, Jack, Queen, King, Ace were given +1. The premise of the system is that every time a card was revealed (it doesn't have to be your own), you would add or subtract accordingly. By doing so, we get a "value"; this value tells us whether or not the current deck is favorable to bet on.
Basically, a high value meant it was not favorable (since to get a high value, you exhaust the 10s and Aces, which are the easiest way to win), and a low value meant it was favorable (using the opposite reasoning, by exhausting the low numbers, there is a higher probability of getting those 10s and Aces).
An example to cement the point before I move on:
We add the appropriate numbers as they appear from left to right:
1-1+0+0-1-1-1-1+1+1 = -2
We end up with a final "value" of -2. This tells us that more low numbers have been used, and therefore we have a higher probability of getting 10s and Aces.
Before I go to the main point of this post, I'll mention that Casinos use multiple decks, I think 6 is the number, when playing Blackjack. However, they do not shuffle the cards back in every game; this is what makes the counting system possible.
In this post, I propose the usage of card counting while playing Mahjong. Although the nature is different, the motive is the same; to predict probability during a game.
The simplest way (And perhaps the only practical way) to do so is if you are looking for one particular suit, so you are trying to form either a half flush or a full flush. For example, I am going for a half flush of Pin; we will denote the suit of interest with a value of +1.
For the other suits (AKA the ones we are not interested in), we denote one of them +100, and -100. For our example, we will denote Man +100, and Sou -100.
Finally, any honour tiles will be denoted 0, since these tiles are essentially "floaters", tiles that take up space that most of the time no one wants.
It may seem preposterous to "count" tiles, but I propose that it is in fact practical. Once again, this is best shown with example.
Due to the nature of Mahjong, and how we discard tiles (As opposed to Blackjack, where we can only add cards, not get rid of them), it would be redundant to count tiles in the hand for two reasons:
1. It will result in double counting of your own hand (You count once in the hand, and again when you discard; we are only interested in the discarded ones)
2. You can't see your opponent's hand. If they decide to steal a tile from the discard, then we in fact do include those in the count (only the new tiles revealed by the player declaring Pon, Chi, Kan though).
As such, we will only count discarded tiles, and those revealed when taking from the pool.
I start by discarding 3 Man, and the computer players follow by discarding honour tiles. So the total count so far is +101 (The +1 comes from the Dora indicator, which we also include when counting, as it is "in the pool" per se). As an aside, I pick Man to be +100 because it is easily memorable (In the sense that Man tiles are essentially large numbers, and you obtain large numbers by adding).
We continue in this fashion:
We start with my second discard, 1 Pin, then South player's (Player on the right) second discard.
-1000+0+0+0+0 = +1
Not shown in the picture is that I declared Pon on West player's South tile, hence the triple bolded +0. I now begin again, starting with my third discard, South player's Third discard, then West player's second discard, and North player's second discard. Then we count accordingly:
-100+0-100+0 = -201
+100+1+0+0 = -102
-100+1+0-100 = -303
+100+1-100+1 = -305
+0+1-100-100 = -506
+0-100+100+0 = -506
So the final count (Before I declare Ron) is -506. I know what you're thinking. "-201 + 100 + 1 isn't -102, it's -101". This is true, but it saves work on unnecessary math. The point is to keep track, not to add. So we essentially have two values we keep track: the +100 -100 series (The uninterested tiles) and the +1 series (The tiles of interest). In that sense, only the first digit (And the second digit should the count go to four digit numbers) are subjected to the negative sign.
But what does this number -505 tell us. It lets us infer a few things.
1. As of this point in the game, more Sou tiles have been dealt than Man tiles (This is the only conclusion we can ascertain).
2. There are, at most, 30 Pin tiles left in the game (At most is the best case scenario, as the final 14 tiles are never revealed unless someone gets a Kan. Even so, that leaves 5 Reverse Dora tiles that are not revealed during the game.)
3. The proportion of Sou tiles to the rest of the tiles is less favorable (This is inferred by comparing the first number, in this case 5, with our last number, which is 6. Since the last number is greater than the first number, we infer that it is less probable of drawing a Sou than anything else). This last inference is very sketchy, as the suit of interest only encompasses 25% of all tiles, while the other 75% is encompassed by the other suits and the honour tiles. If there was at least 3 deviations away from that value (So -18 or +18), then it would be a stronger inference that it would be more probable to draw the suit of interest.
It's not hard to keep track of two numbers in your head; with practice it'll help you up your game.
PS: That hand was a half-flush with one triplet honour/wind. The way the hand is constructed, it sums up to 30 fu, 3 fan, which amasses 5800 points, all to be paid by North player (The one who dealt the winning tile). I'll do a post on the point system eventually...
Monday, March 7, 2011
麻雀: セーフタイル
Consider the finished game above. Today, we'll be drawing from the pool of discards in order to discuss "safe" tiles.
Safe tiles are basically tiles that have a better chance of NOT dealing into your opponent's hand. In reality, no tile is 100% safe; it's just that relative to other tiles, your opponent will want them less. Of course each game has their own set of safe tiles, but as a general rule of thumb, terminals and honors are considered safe. The point of interest and where we will begin our examination is when East player (Bottom) declares Riichi by discarding 7 Man (Their 12th discard).
Remember that players take turn in a counter-clockwise fashion, so then South player (Right). Their first discard after the declaration of Riichi is 2 Man (South Player's 12th discard). It isn't really 2 Man, due to the taking of discards which influences pool count, but for the sake of practicality, we will assume it is. In this sense, we start with each player's 12th discard.
We now examine each discard up until East player gets Tsumo.
Levels of safety are as listed, from safest to most dangerous:
Absolutely safe
Safe
Not safe
Dangerous
1) 2 Man: This is safe because there are already three 2 Man in the pool; two 2 Man in West player's pool, and the third one as a Dora indicator. Another rule of thumb is that Dora indicators are pseudo-safe tiles, since everyone knows at the beginning of the game (or when someone gets a Kan) what tile there is one less of. I could go on about Dora, but a full post on the subject will be for another day though.
2) 6 Pin: This is not safe, but it isn't dangerous either. Since there is already one 6 Pin in the pool (South), there is a less chance the Riichi player will want it. However, it is quite common that a player in Tenpai will go for a tile that's already out in the pool. Only when there is 2 or 3 that are in the pool does that particular tile become a deterrent.
3) South: This is absolutely safe. Since East player discarded a South tile earlier (8th discard), they cannot win by taking a South tile from another player. This is a rule called Furiten, which basically means that any tile you discard, you can't take from someone to win. You can still draw that tile for a Tsumo however. Granted it may be an absolutely safe discard against East player, the other two players may want it, since it is the Round Wind. But we will only consider the player who declared Riichi.
4) North: No point discussing safe tiles when the Riichi player discards them. They will only be listed for reference.
5) Green Dragon: Absolutely safe; see #3.
6) 3 Sou: Safe, for the same reasoning as #1.
7) 8 Sou: Not safe, see #2.
8) 8 Sou
9) 6 Sou: Dangerous. The pool has no 6 Sou in it, and by probability, that means they are being held by other players. That is indeed the case, since North player takes it for a triplet. Discard #10 would therefore be from North player, but once again for simplicity, I will go in order.
10) 5 Man: Dangerous. See previous explanation.
11) South: Absolutely safe. Rule of Furiten, and that it had already been discarded since the player declared Riichi.
12) White Dragon
13) 1 Pin: Absolutely safe. See #11.
14) 5 Man: Absolutely safe. This was discarded by the same player last turn, and since Riichi player didnt' want it then, they wouldn't want it now.
15) 7 Man: Absolutely safe. This was the tile that was discarded when declaring Riichi; therefore it is also subjected to the rule of Furiten.
16) White Dragon: Absolutely safe. Discarded by Riichi player.
17) 8 Sou: Absolutely safe. Whereas this tile wasn't safe before, since it was discarded and passed by the Riichi player, then it becomes absolutely safe.
18) 6 Pin: Absolutely safe. See previous explanation.
19) 7 Pin
20) 9 Pin: Absolutely safe. Rule of Furiten, and rule of thumb of terminals.
21) 3 Pin: Dangerous. This is the first dangerous tile in a while, and it is so because there is no 3 Pin in any other player's pool. However, it passes.
22) 6 Pin: Absolutely safe, since this is the second time it had been discarded.
23) 5 Sou
24) 1 Man: Safe, due to the rule of thumb of terminals.
25) North: Absolutely safe. Rule of Furiten.
26) 2 Sou: Absolutely safe. Ignoring the double reverse Dora indicators (Which you wouldn't even know about unless Riichi player won), it is safe due to the Rule of Furiten.
27) East: Tsumo
I mentioned before that I'd go in order to simplify things; this left out a few discards which we will go over now. We start with West player's last discard, then discuss the rest of North player's discards.
28) 2 Pin: Safe. Although not visible in the image, North player discarded a 2 Pin early in the game and South player completed a triplet with it. By probability, it is safe, but since it had not been played during the Riichi cycle, nor is it a Furiten tile, it can still be dangerous.
29) 5 Sou: Absolutely safe. Rule of Furiten.
30) 9 Pin: Absolutely safe. Rule of Furiten.
31) 1 Man: Absolutely safe. Was discarded previously (#24).
To sum it all up, just remember 3 things:
1) Rule of Furiten
2) Rule of thumb of terminals and honors
3) Any tile someone else discarded during the Riichi cycle means that you can discard it without worry (At least without worry from the Riichi player).
Remembering these simple things allows you to basically lose less. Once again, I note that no matter how good you are at not dealing into someone's hand, they can always just get lucky and Tsumo.
Things get more complicated when 2 or even 3 players declare Riichi, but it really is the same concept. By having discard pools, it makes Riichi Mahjong the most analytical type of Mahjong, which is why it's my preferred variant.
I end with the original picture, with the hands and melds visible. I'd also like to note that this is my best hand ever (Last one to hold the title was a 13 Orphans hand).
Monday, February 28, 2011
麻雀の戦略: 上天結論
Continuation of this post
This will be a short post, but it merely concludes what I was discussing last week. Last week we learned how to determine your own Shan Ten. This is a useful technique to learn in order to adjust your play style accordingly.
Now I discuss how to predict your opponent's Shan Ten. Since you cannot see your opponent's hand, the best guess at their Shan Ten range is through their discards. Think about it logically; someone who discards many tiles either has a very low Shan Ten (Close to winning, so they are only looking for one or two specific tiles) or a very high Shan Ten (Less likely, although this may be a sign that they are going for a special hand, i.e. 7 Pairs or 13 Orphans).
Granted, when playing computer opponents, you don't actually get to see them remove a tile from their own hand, which is an easy sign of decreasing Shan Ten (Remember that if you replace one of your potential discards to form a meld, you subtract 1 Shan Ten). Still, let's look at the situation from last week again:
Here we see South player declaring Riichi after their fourth discard. From this, we can ascertain that their Shan Ten count was between 1 and 5. It would be very rare (Probably never) for a computer to not declare Riichi if possible, so then we narrow down to between 2 and 5. The most probable number is either 2 or 3, depending on how you interpret the discards.
Their first discard is 2 Pin. Since it isn't a terminal or honor, we can assume that the computer isn't going for a half or full flush of Pin, and we can also assume that they do not hold 1, 2, or 3 Pin.
The alternate assumption is that they drew that tile during their turn, and discarded as it did not decrease their Shan Ten number. This latter assumption is more likely, but again since we cannot physically see which tile they discard, it is only an assumption. In real life, the former assumption would hold if they kept their draw and discarded the 2 Pin from their own hand.
The next two discards are both honors. Therefore, we can easily assume that these were their draws, and that they are not going for a hand that utilizes honors. Alternatively, these were in their hand from the start, but that would mean they kept drawing tiles that lowered their Shan Ten count. It becomes less probable that they keep drawing necessary tiles when the Shan Ten count is close to 2 or 1.
Finally, their Riichi discard is 4 Man, so they reached Tenpai as of the fourth draw. Then they win by Tsumo on their sixth draw.
I'll end by repeating that against computer opponents, it is extremely difficult, if not impossible, to know their Shan Ten count just by their discards. Their discards can give you an idea as to what kind of hand they are building. In addition, any melds they form by taking a tile from the pool essentially lowers their potential Shan Ten count by 3 (As a meld is a sequence of 3 tiles, and since the meld is visible, the highest possible Shan Ten is therefore 11, however low a probability that may be).
The next topic will probably be reading hands based on the discard pool; a very important technique to learn if you don't want to deal into someone.
This will be a short post, but it merely concludes what I was discussing last week. Last week we learned how to determine your own Shan Ten. This is a useful technique to learn in order to adjust your play style accordingly.
Now I discuss how to predict your opponent's Shan Ten. Since you cannot see your opponent's hand, the best guess at their Shan Ten range is through their discards. Think about it logically; someone who discards many tiles either has a very low Shan Ten (Close to winning, so they are only looking for one or two specific tiles) or a very high Shan Ten (Less likely, although this may be a sign that they are going for a special hand, i.e. 7 Pairs or 13 Orphans).
Granted, when playing computer opponents, you don't actually get to see them remove a tile from their own hand, which is an easy sign of decreasing Shan Ten (Remember that if you replace one of your potential discards to form a meld, you subtract 1 Shan Ten). Still, let's look at the situation from last week again:
Here we see South player declaring Riichi after their fourth discard. From this, we can ascertain that their Shan Ten count was between 1 and 5. It would be very rare (Probably never) for a computer to not declare Riichi if possible, so then we narrow down to between 2 and 5. The most probable number is either 2 or 3, depending on how you interpret the discards.
Their first discard is 2 Pin. Since it isn't a terminal or honor, we can assume that the computer isn't going for a half or full flush of Pin, and we can also assume that they do not hold 1, 2, or 3 Pin.
The alternate assumption is that they drew that tile during their turn, and discarded as it did not decrease their Shan Ten number. This latter assumption is more likely, but again since we cannot physically see which tile they discard, it is only an assumption. In real life, the former assumption would hold if they kept their draw and discarded the 2 Pin from their own hand.
The next two discards are both honors. Therefore, we can easily assume that these were their draws, and that they are not going for a hand that utilizes honors. Alternatively, these were in their hand from the start, but that would mean they kept drawing tiles that lowered their Shan Ten count. It becomes less probable that they keep drawing necessary tiles when the Shan Ten count is close to 2 or 1.
Finally, their Riichi discard is 4 Man, so they reached Tenpai as of the fourth draw. Then they win by Tsumo on their sixth draw.
I'll end by repeating that against computer opponents, it is extremely difficult, if not impossible, to know their Shan Ten count just by their discards. Their discards can give you an idea as to what kind of hand they are building. In addition, any melds they form by taking a tile from the pool essentially lowers their potential Shan Ten count by 3 (As a meld is a sequence of 3 tiles, and since the meld is visible, the highest possible Shan Ten is therefore 11, however low a probability that may be).
The next topic will probably be reading hands based on the discard pool; a very important technique to learn if you don't want to deal into someone.
Monday, February 21, 2011
麻雀の戦略: 上天
And so begins a series of strategy-dedicated posts on Mahjong. Based on my free time, these will range from extremely analytical (probability, mathematics, etc), to just basic practical.
This post is one of many of the latter.
So often we are fixated on attaining a winning hand that we often forget to keep track of not only how many tiles we are away from winning, but also how many the opponent potentially could be.
Shan Ten (上天) is basically the practice of keeping track of that. The ideal Shan Ten is Zero Shan Ten, because obviously when you need zero tiles to win, you win. Then the most familiar Shan Ten is One Shan Ten, which is Tenpai. The pattern follows as such; Two Shan Ten would be two tiles away from a winning hand, Three Shan Ten would be three tiles away ... up to Thirteen Shan Ten (Which is ridiculously rare, but I won't bore you with the math).
Why keep track of such a mundane thing? By knowing how close (or far, if you will) you are from winning, it allows you to play the round in an appropriate style to suit the situation. This is most prominent at the beginning, when you construct your hand from the wall.
Keeping track of your own Shan Ten is child's play; I'll do an example right now:
Note that most (if not all) Mahjong games will arrange your tiles automatically for you, thus making it all the more easier to keep track.
At first, it may be hard to tell how many tiles you are from a winning hand; the best way is to construct melds with the available tiles. The only possible melds for this opening hand would be 4-5-6 Pin (Dots). Next, we construct partial melds; 2 out of 3. There are many here:
- 4-5 Man
- 4-4 Pin
- 3-4 Sou (Bamboo)
- 6-7 Sou
Finally we list our possible discards (The remaining tiles basically):
- 9 Man
- 9 Pin
- South Wind
- North Wind
As an aside, notice that our discards will most of the time (in this case, all of them) be terminal and honour tiles. A probability-based explanation is necessary to elaborate this logic, but that can be another post.
Now we work backwards. Since we have 4 potential discards, that is our initial Shan Ten number. 4 Shan Ten is therefore our maximum, and therefore we are four tiles away from winning. Granted with every new draw the Shan Ten number fluctuates, as of now, this is our Shan Ten number.
This is easy to prove; simply remove the discards, and replace them with tiles that would make melds. For example, I replace them with 6 Man, 7 Pin, 2 Sou, and 8 Sou. This results in an All Simples hand.
It is worth noting that you cannot always assume the number of discards is equal to the Shan Ten number. That is because the Shan Ten number that gives us is the minimum; by changing our melds and partial melds, it changes the potential discards, and therefore gives us a new, higher Shan Ten.
An example here would be our 4-4-5-6. We have listed 4-5-6 Pin as our only complete meld, but we have also listed 4-4 Pin as a partial meld. Since these events are mutually exclusive (Both can't occur simultaneously because if you do stick with the 4-5-6, then the 4 becomes an outlier and therefore a discard) the overall result increases the Shan Ten number to 5 Shan Ten.
But this is a bad example in the sense that you could redo our listing to include 4-4 Pin and 5-6 Pin as partial melds. However, this only simplifies the list; and doesn't change the maximum Shan Ten.
Finally, I'd like to note that after all this, we still have not considered Winning Conditions. Shan Ten does not take that into consideration; if we did however, we would, in most cases, get a higher Shan Ten number. But once again, the minimum Shan Ten doesn't change.
Now that we know we are 4 Shan Ten (Which by the way, is the most common number for a starting hand, with 3 being a very close second), we can draw a few tiles to see if our situation improves.
Unfortunately, the overall situation does not improve, as one player has already declared Riichi after their fourth discard. What can we conclude from this image? Well first let's find our new Shan Ten, without all the explicit work. This may seem harder, with a lot more options to choose from for discards, but just use common sense and pick discards based on the construction of your hand.
After a quick scan, I choose my double 9 Man and my 3 Sou as my discards, thus making it a 3 Shan Ten hand. This hand would still be All Simples, but would allow me to declare Riichi if it remained fully concealed.
We are far from winning (Yes, 3 tiles is still a long ways to go). But someone is already Tenpai. It would be best to play defensively, and hoping in the end that no one plays into their hand, they do not draw the winning tile, and through all that chaos, still get your hand to Tenpai or even win.
Reading the discard and reading your opponent's hand based on the discard will be obviously another post. But for now just note that it is hard to tell what the opponent is aiming for, mainly because their discard pile is so small, and that half of the discards are honour tiles. The safest route to take would be to get rid of double 9 Man, which also helps me get closer to Tenpai.
Indeed the 9 Man were safe bets for discards, but in the end, they managed to Tsumo. No matter how skilled you are in the game, you will always lose to luck. But at the end of the day, luck comes and goes, while skill stays with you until the end.
Next week I will probably expand more on Shan Ten and conclude.
This post is one of many of the latter.
So often we are fixated on attaining a winning hand that we often forget to keep track of not only how many tiles we are away from winning, but also how many the opponent potentially could be.
Shan Ten (上天) is basically the practice of keeping track of that. The ideal Shan Ten is Zero Shan Ten, because obviously when you need zero tiles to win, you win. Then the most familiar Shan Ten is One Shan Ten, which is Tenpai. The pattern follows as such; Two Shan Ten would be two tiles away from a winning hand, Three Shan Ten would be three tiles away ... up to Thirteen Shan Ten (Which is ridiculously rare, but I won't bore you with the math).
Why keep track of such a mundane thing? By knowing how close (or far, if you will) you are from winning, it allows you to play the round in an appropriate style to suit the situation. This is most prominent at the beginning, when you construct your hand from the wall.
Keeping track of your own Shan Ten is child's play; I'll do an example right now:
Note that most (if not all) Mahjong games will arrange your tiles automatically for you, thus making it all the more easier to keep track.
At first, it may be hard to tell how many tiles you are from a winning hand; the best way is to construct melds with the available tiles. The only possible melds for this opening hand would be 4-5-6 Pin (Dots). Next, we construct partial melds; 2 out of 3. There are many here:
- 4-5 Man
- 4-4 Pin
- 3-4 Sou (Bamboo)
- 6-7 Sou
Finally we list our possible discards (The remaining tiles basically):
- 9 Man
- 9 Pin
- South Wind
- North Wind
As an aside, notice that our discards will most of the time (in this case, all of them) be terminal and honour tiles. A probability-based explanation is necessary to elaborate this logic, but that can be another post.
Now we work backwards. Since we have 4 potential discards, that is our initial Shan Ten number. 4 Shan Ten is therefore our maximum, and therefore we are four tiles away from winning. Granted with every new draw the Shan Ten number fluctuates, as of now, this is our Shan Ten number.
This is easy to prove; simply remove the discards, and replace them with tiles that would make melds. For example, I replace them with 6 Man, 7 Pin, 2 Sou, and 8 Sou. This results in an All Simples hand.
It is worth noting that you cannot always assume the number of discards is equal to the Shan Ten number. That is because the Shan Ten number that gives us is the minimum; by changing our melds and partial melds, it changes the potential discards, and therefore gives us a new, higher Shan Ten.
An example here would be our 4-4-5-6. We have listed 4-5-6 Pin as our only complete meld, but we have also listed 4-4 Pin as a partial meld. Since these events are mutually exclusive (Both can't occur simultaneously because if you do stick with the 4-5-6, then the 4 becomes an outlier and therefore a discard) the overall result increases the Shan Ten number to 5 Shan Ten.
But this is a bad example in the sense that you could redo our listing to include 4-4 Pin and 5-6 Pin as partial melds. However, this only simplifies the list; and doesn't change the maximum Shan Ten.
Finally, I'd like to note that after all this, we still have not considered Winning Conditions. Shan Ten does not take that into consideration; if we did however, we would, in most cases, get a higher Shan Ten number. But once again, the minimum Shan Ten doesn't change.
Now that we know we are 4 Shan Ten (Which by the way, is the most common number for a starting hand, with 3 being a very close second), we can draw a few tiles to see if our situation improves.
Unfortunately, the overall situation does not improve, as one player has already declared Riichi after their fourth discard. What can we conclude from this image? Well first let's find our new Shan Ten, without all the explicit work. This may seem harder, with a lot more options to choose from for discards, but just use common sense and pick discards based on the construction of your hand.
After a quick scan, I choose my double 9 Man and my 3 Sou as my discards, thus making it a 3 Shan Ten hand. This hand would still be All Simples, but would allow me to declare Riichi if it remained fully concealed.
We are far from winning (Yes, 3 tiles is still a long ways to go). But someone is already Tenpai. It would be best to play defensively, and hoping in the end that no one plays into their hand, they do not draw the winning tile, and through all that chaos, still get your hand to Tenpai or even win.
Reading the discard and reading your opponent's hand based on the discard will be obviously another post. But for now just note that it is hard to tell what the opponent is aiming for, mainly because their discard pile is so small, and that half of the discards are honour tiles. The safest route to take would be to get rid of double 9 Man, which also helps me get closer to Tenpai.
Indeed the 9 Man were safe bets for discards, but in the end, they managed to Tsumo. No matter how skilled you are in the game, you will always lose to luck. But at the end of the day, luck comes and goes, while skill stays with you until the end.
Next week I will probably expand more on Shan Ten and conclude.
Monday, February 14, 2011
Monday, January 31, 2011
麻雀の図: 単純
The diagram speaks for itself. Due to the convention of MS Paint, arrows are hard to add, so just read the thing from down and left if left side, right if right side, and only going up if that's the only option available.
Red lines are game enders, blue line restarts game.
Tuesday, January 25, 2011
数値円陣
Let's say we have five #1's, and four #0, arranged randomly in a circle. Between every two numbers that are the same, you put a 1, and between every two numbers that are different, you put a zero. After doing so, you remove the previous set of numbers.
The question now is: Is it ever possible to have a circle of nine #0's?
Let's look at a random distribution first:
I use Mahjong tiles that are face up to denote #0, and face down tiles to denote #1. The inner ring is our random distribution of numbers in a circle, while the outer ring is the result of performing the addition processes mentioned above. From our test of the random distribution, we can see that in order for any chance that there could be nine #0's, we should arrange the numbers to alternate in a circle as so.
But a problem arises, which we can see if we repeat the process.
Our result is eight #0's, and one #1.
In conclusion, no, there is no distribution of the given numbers that will result in a sequence of nine #0's.
Since the total numbers in the circle are odd, and the fact that we have one more #0 than we have #1, the circle is bound to have at least one pair of repeating numbers (since the first number connects with the last number to form the circle). No matter how many times we repeat the procedure, the maximum number of #0's will be eight.
The question now is: Is it ever possible to have a circle of nine #0's?
Let's look at a random distribution first:
I use Mahjong tiles that are face up to denote #0, and face down tiles to denote #1. The inner ring is our random distribution of numbers in a circle, while the outer ring is the result of performing the addition processes mentioned above. From our test of the random distribution, we can see that in order for any chance that there could be nine #0's, we should arrange the numbers to alternate in a circle as so.
But a problem arises, which we can see if we repeat the process.
Our result is eight #0's, and one #1.
In conclusion, no, there is no distribution of the given numbers that will result in a sequence of nine #0's.
Since the total numbers in the circle are odd, and the fact that we have one more #0 than we have #1, the circle is bound to have at least one pair of repeating numbers (since the first number connects with the last number to form the circle). No matter how many times we repeat the procedure, the maximum number of #0's will be eight.
Monday, January 24, 2011
麻雀のゲームプレイ
Now that we know how to set up the game, we can now play. I will assume that you are familiar with all the tiles (They are easy enough to interpret, except maybe for the Chinese numbers and the honors).
Since I found my portable Mahjong set, I can construct the full wall to remind you of the previous post:
Now we follow the procedure after setting up the wall and we end up with this:
The dealer has 14 tiles (hard to see from a bird's eye view) while the other players have 13. The players then take their tiles and place them in front of them like so:
They should look something like this; in other words, a random distribution. Now is the time to organize your tiles to make life easier for you.
As the dealer, you have one extra tile, so you discard one. Then each player takes turns drawing from the wall and discarding a tile.
Make an appropriate gap for where the tile falls into the sequence.
Put the tile in, and then remove a tile to discard:
To indicate the person you took the tile from, you flip that tile in the direction that your opponent is in. In this case, I took from the opponent that was to the right of me.
In the special case that you initially have 3 of a certain tile, and a fourth one is discarded, you declare "Kan" and follow the same procedure. Except this time, you get to draw a new tile from the dead wall, which is on the opposite side of the active wall. After drawing, you discard as usual and the game continues.
You can also take a discard if it forms a sequence, which is called a "Chi". However, since the probability of obtaining a sequence from a discard is much higher than obtaining a triplet, to compensate you can only declare Chi if the player on your left discards the tile.
As the game progresses, someone may declare Riichi, and discard their tile horizontally. This indicates that they are in Tenpai (One tile away from winning). It may seem dumb to tell your opponents you are about to win, but it all becomes logical when we go into the theory and point system. For now, just assume that doing this is more advantageous than disadvantageous.
Since I found my portable Mahjong set, I can construct the full wall to remind you of the previous post:
Now we follow the procedure after setting up the wall and we end up with this:
The dealer has 14 tiles (hard to see from a bird's eye view) while the other players have 13. The players then take their tiles and place them in front of them like so:
They should look something like this; in other words, a random distribution. Now is the time to organize your tiles to make life easier for you.
The general order (Not a written rule per se, but most follow it) of tile arrangement is 1-9, Man (Chinese numbers), 1-9 Pin (Circles, coins, buckets, etc), 1-9 Sou (The bamboo sticks. The funny looking bird is the 1 Bamboo stick), Wind tiles (East, South, West, North) and Dragon tiles (White, Red, Green). And yes, I did put red before white, but again, unwritten rules are unwritten.
The simplified objective of the game is to create a hand with 4 melds, and a pair of eyes. Melds are either three of a kind triples, or sequences (1,2,3; 4,5,6, etc) of the same suit (Suits are the Man, Pin, and Sou previously mentioned).
When you draw a tile, place it horizontally on top of your hand. If you don't want it, place it in the discard zone. If you want it, then replace it with one in your hand and throw that to the discard zone. The procedure is arbitrary and you don't need to follow it. Again, this is just how Japanese people play.
Put the tile in, and then remove a tile to discard:
In this case I removed an end tile, so separation and fixing my hand was not necessary. Discard the tile.
In Japanese Mahjong, you organize your discards in this fashion. Each row contains 6 tiles, and then a new row is created under it. There are a maximum of 3 rows, and if the third row reaches 6 tiles, then that row continues until the game is over.
Throughout the game players may discard tiles that you want. If they deal a tile that you have doubles of, you can declare "Pon" and take that tile, thereby forming a triplet.
The basic procedure is you declare Pon, reveal your own tiles, then take all three and put them on your right. You then discard one of your tiles, because your hand should always remain at 13, except when after drawing and when you win.
In the special case that you initially have 3 of a certain tile, and a fourth one is discarded, you declare "Kan" and follow the same procedure. Except this time, you get to draw a new tile from the dead wall, which is on the opposite side of the active wall. After drawing, you discard as usual and the game continues.
You can also take a discard if it forms a sequence, which is called a "Chi". However, since the probability of obtaining a sequence from a discard is much higher than obtaining a triplet, to compensate you can only declare Chi if the player on your left discards the tile.
Once again notice that the tile I took, 3 Bamboo, is pointing to the left, the opponent I took it from. You should show the meld in the logical sequence (1,2,3) but priority is given to the indication tile (The tile you took which points to the opponent you took it from). So in this case the sequence would be 3 (Indication tile pointing left), then follows normal sequence 1,2.
If your hand is in Tenpai, and someone discards the tile you need to win, you declare "Ron" and show your hand. Then the person who discarded the tile will pay you points based on how good your hand is. If your hand is in Tenpai and you draw the winning tile, then it is called "Tsumo" and each player will pay you.
The game ends either when someone wins, or the dead wall is reached (Remember you can't draw from the dead wall unless you get a Kan). In the case that no one wins, if you are in Tenpai, you show your hand. Players who are not in Tenpai (Or do not show their hand for other reasons; again a theory topic), must pay those players who are in Tenpai points. The general rule of thumb is either win, or if you can't for various reasons, get Tenpai.
Two players are in Tenpai (Myself, and the player across from me). The other two players would then have to pay points to us, because they failed to produce a Tenpai hand.
This is the general game play of Japanese Mahjong. Mechanics, points, and theory (Many, many topics I could cover) will be separate posts, but with the way school is progressing, don't expect these comprehensive posts for a while.
Monday, January 17, 2011
東方十七歩
So instead of continuing with rules, I'm going to share something neat I found.
This is 東方十七歩 (Touhou Seventeen Steps would be a direct translation), or Touhou Landmine Mahjong is a better name for it.
What is Landmine Mahjong? I'm pretty sure there's a different name for it, but this is the only one I know. It's actually a concept that's new to me, and until playing this game, have never tried.
Well let's see what this game has to offer.
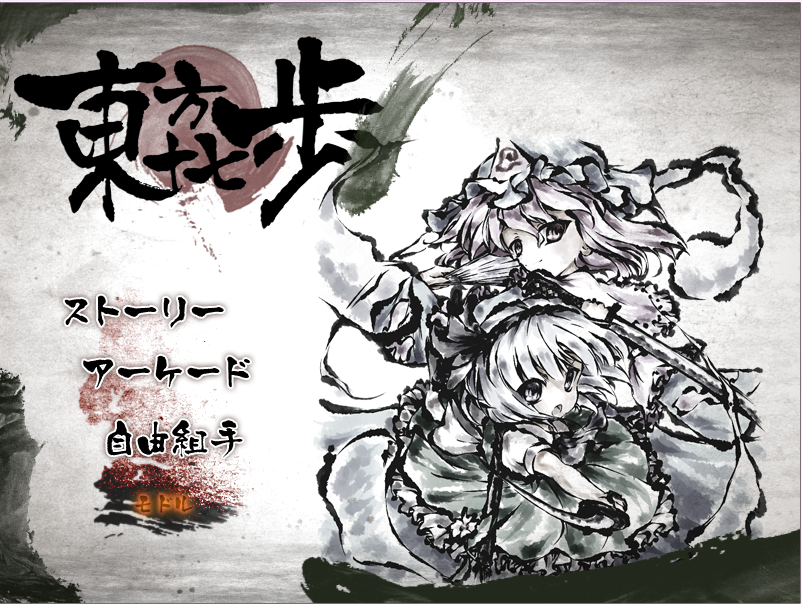
From the title screen, you can see four options. Pick the first one for CPU matches, the second for online matches with others, the third is options (This is in English for some reason), and the last option is exit.
The next screen has three more options. First one is Story Mode (Not working yet because this is just a preliminary version, 0.100), second is Arcade Mode (Probably the one you want to pick), and the third is free play mode, where you can pick your character and your opponent and play one match.
There are ten teams you can play as (choose by scrolling or with up and down arrow keys):
1) Border Team: Reimu & Yukari
2) Magic Team: Marisa & Alice
3) Moriya Team: Sanae, Suwako, & Kanako
4) Scarlet Devil Mansion Team: Remilia & Sakuya
5) Oni Team: Suika & Yuugi
6) Ghost Team: Youmu & Yuyuko
7) Hourai Team: Kaguya & Mokou
8) Subterranean Team: Rin & Utsuho (Orin & Okuu)
9) Komeji Team: Satori & Koishi
10) Tengu Team: Aya & Hatate
You can also see the abilities of each team; each character has their own spell card to alter the playing conditions (Such as adding a new dora indicator, hiding your discard, etc). I chose Magic Team (Their spell cards increase my fu or han) because I'm a Marisa x Alice Shipper.
When you choose your team, click on the character portrait, and an options screen appears. Since I'm strapped for time, I won't go over these options, but you should really only modify them if you know what you're doing in the first place. Click okay.
You get a nice VS screen, click again to start the game.
As you can see, this isn't your traditional Mahjong game. Here, you get a full wall to yourself (17 x 2, or 34 tiles) and from that wall you have 300 seconds to construct the best Tenpai hand you can.
Some things to note:
- The Dora indicator is the tile on the bottom right
- The blue orbs are what you press to activate your spell cards. Some you can only activate during hand construction, while others during the discarding session. The orange bar shows how much magic you have and it depletes when you use a spell card and fills the more you play.
- The rules button is the characters with the orange blob background. You can click this to go over how much certain hands are worth, etc. But this does not stop the timer.
I'll build a random hand now:
Observant people will notice that this isn't the same wall I had to begin with, as well as the top left number changing from 1 to 2. That is because there is no way to pause the game, and if you are doing something else (Such as making a blog post), the timer will eventually reach zero. When that happens, you get a randomly generated hand, which most of the time isn't in Tenpai.
Some other things to notice:
- The top now has colorful words. This indicates what conditions I have met in this hand.
- The top left above the hand shows what tiles I am waiting for.
- The blue orbs are now red. This indicates that I have used that spell card for that particular round. The orange bar depleted as a result.
When you are satisfied with the hand you made, click, then click continue. The discard portion of the game now begins:
Each player takes turns discarding tiles from their remaining wall. In this way, the only way to win is through your opponent playing into your hand; there is no Tsumo, only Ron.
This continues until either one player wins, or each player has dealt 17 tiles. If the latter, the game is a draw.
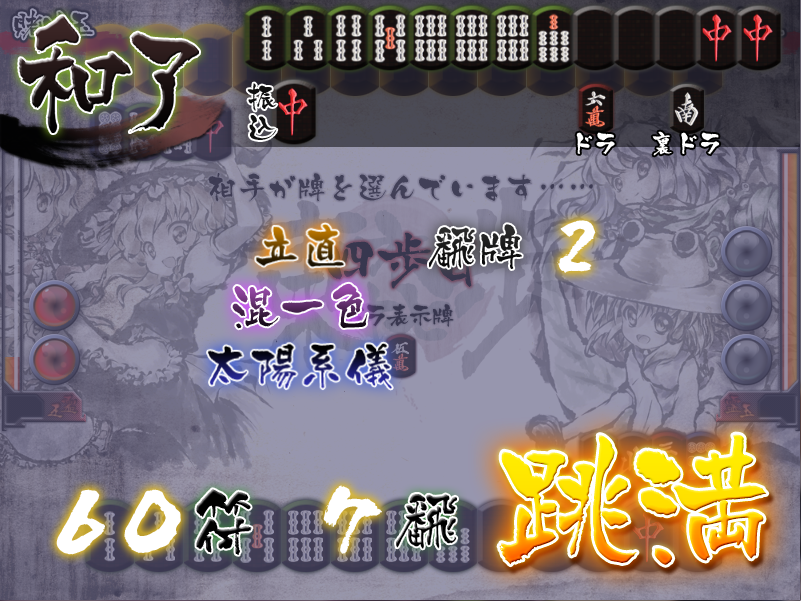
In this case I have won (obviously), and here is the results screen:
Again, it shows my conditions, as well as the Dora & Ura-Dora indicators.
Finally I take points from my opponent based on how good my hand is (We each started with 18.0). The point system is not the conventional Japanese way, but the same rule applies that a better hand gives more points.
You do this for a few more games, and then a winner is decided. Then you move on to the next opponent, regardless of whether you win or lose.
Overall this is a very fun way of playing Mahjong. This "Speed Mahjong" can help you develop your skills in hand construction, which is probably the most important skill of all in the game.
You can download the game here: http://www.mediafire.com/?pfg65qi54i5tz5a
This is 東方十七歩 (Touhou Seventeen Steps would be a direct translation), or Touhou Landmine Mahjong is a better name for it.
What is Landmine Mahjong? I'm pretty sure there's a different name for it, but this is the only one I know. It's actually a concept that's new to me, and until playing this game, have never tried.
Well let's see what this game has to offer.
From the title screen, you can see four options. Pick the first one for CPU matches, the second for online matches with others, the third is options (This is in English for some reason), and the last option is exit.
The next screen has three more options. First one is Story Mode (Not working yet because this is just a preliminary version, 0.100), second is Arcade Mode (Probably the one you want to pick), and the third is free play mode, where you can pick your character and your opponent and play one match.
There are ten teams you can play as (choose by scrolling or with up and down arrow keys):
1) Border Team: Reimu & Yukari
2) Magic Team: Marisa & Alice
3) Moriya Team: Sanae, Suwako, & Kanako
4) Scarlet Devil Mansion Team: Remilia & Sakuya
5) Oni Team: Suika & Yuugi
6) Ghost Team: Youmu & Yuyuko
7) Hourai Team: Kaguya & Mokou
8) Subterranean Team: Rin & Utsuho (Orin & Okuu)
9) Komeji Team: Satori & Koishi
10) Tengu Team: Aya & Hatate
You can also see the abilities of each team; each character has their own spell card to alter the playing conditions (Such as adding a new dora indicator, hiding your discard, etc). I chose Magic Team (Their spell cards increase my fu or han) because I'm a Marisa x Alice Shipper.
When you choose your team, click on the character portrait, and an options screen appears. Since I'm strapped for time, I won't go over these options, but you should really only modify them if you know what you're doing in the first place. Click okay.
You get a nice VS screen, click again to start the game.
As you can see, this isn't your traditional Mahjong game. Here, you get a full wall to yourself (17 x 2, or 34 tiles) and from that wall you have 300 seconds to construct the best Tenpai hand you can.
Some things to note:
- The Dora indicator is the tile on the bottom right
- The blue orbs are what you press to activate your spell cards. Some you can only activate during hand construction, while others during the discarding session. The orange bar shows how much magic you have and it depletes when you use a spell card and fills the more you play.
- The rules button is the characters with the orange blob background. You can click this to go over how much certain hands are worth, etc. But this does not stop the timer.
I'll build a random hand now:
Observant people will notice that this isn't the same wall I had to begin with, as well as the top left number changing from 1 to 2. That is because there is no way to pause the game, and if you are doing something else (Such as making a blog post), the timer will eventually reach zero. When that happens, you get a randomly generated hand, which most of the time isn't in Tenpai.
Some other things to notice:
- The top now has colorful words. This indicates what conditions I have met in this hand.
- The top left above the hand shows what tiles I am waiting for.
- The blue orbs are now red. This indicates that I have used that spell card for that particular round. The orange bar depleted as a result.
When you are satisfied with the hand you made, click, then click continue. The discard portion of the game now begins:
Each player takes turns discarding tiles from their remaining wall. In this way, the only way to win is through your opponent playing into your hand; there is no Tsumo, only Ron.
This continues until either one player wins, or each player has dealt 17 tiles. If the latter, the game is a draw.
In this case I have won (obviously), and here is the results screen:
Again, it shows my conditions, as well as the Dora & Ura-Dora indicators.
Finally I take points from my opponent based on how good my hand is (We each started with 18.0). The point system is not the conventional Japanese way, but the same rule applies that a better hand gives more points.
You do this for a few more games, and then a winner is decided. Then you move on to the next opponent, regardless of whether you win or lose.
Overall this is a very fun way of playing Mahjong. This "Speed Mahjong" can help you develop your skills in hand construction, which is probably the most important skill of all in the game.
You can download the game here: http://www.mediafire.com/?pfg65qi54i5tz5a
Subscribe to:
Posts (Atom)